
Previous post

Next post


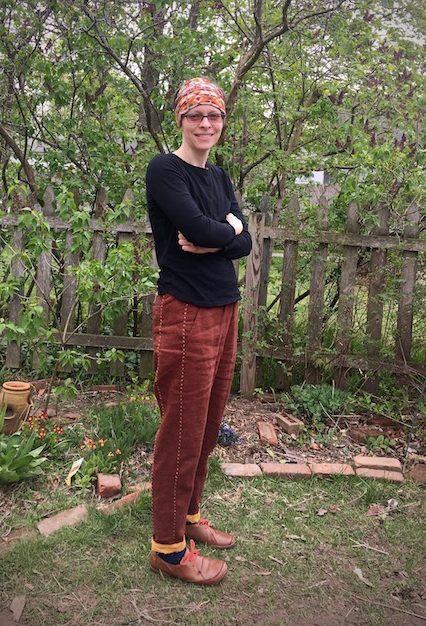
My first effort at making something new for this year’s Me Made May was a pair of Sew House Seven’s Free-Range Slacks. I got the pattern ages ago, and traced Version 1 onto freezer paper, but then didn’t go any further.
There’s so much anticipatory brain power that goes into starting a new pattern sometimes. I don’t have a ton of pants experience (here are my Arenites), and I’m not even great at buying RTW pants that fit.
I cut a straight size 4 based on my measurements. Fortunately, there were no fit issues. I was surprised by how flattering the pants were for being woven fabric with elastic at the top.
I used a rusty linen from Stonemountain and Daughters Fabric. It’s the most I’ve ever spent per yard of fabric. I was pleased with the heft and movement of the fabric – the finished pants feel like they will work for a wide range of weather. It’s hard to cut into expensive fabric. I like the insides of my clothes to be cleanly finished, so I folded the pocket facing over twice by a quarter inch instead of leaving it raw. I ran into trouble with the long seams because I had one already half-used spool of matching thread, and I realized early on that I didn’t have enough to flat fell the seams in the matching color.
Anticipating a thread shortage, I used rainbow thread for all the interior seams. I cut down one side of each side panel seam to a quarter inch, and hand sewed a running stitch to secure the longer side of the seam in a fold over the short side.  One of my goals this May was to not buy new fabric, but make pieces from my stash using thread, patterns, and notions I have on hand. The pandemic makes this even easier as going to the craft store for a quick thread run is impossible, and we’re being conservative with spending since it’s unclear what the near future will bring.
I have gold sashiko thread in my mending kit, so I decided to do a simple pattern of X’s down both sides of the panels to tack down the folded-over seams on the inside and add a decorative element to the outside that wasn’t too flashy.  The worst part of hand sewing the side panels was that I didn’t want to do the work with the pants constructed. Since I didn’t do a muslin, I did all the hand stitching not knowing how the pants would fit other than a quick test holding one side up around my leg.
I COULD have basted them together and tried them on first, but those extra steps are a barrier that make me not want to sew, so I didn’t.
I used French seams on the inner leg and crotch seams, doing a regular French seam for the crotch and for the inner leg using a 3/8 seam to close the long seams, reducing the leg size by a quarter inch. I’d read a few places that people found the pants baggy – these were JUST right, but if I made them again I’d leave myself with the extra space.  I used a contrasting cotton ikat fabric for the inner waistband, and used 2 inch elastic instead of 1.5 inch. I didn’t have to modify the pattern pieces to accommodate the wider elastic, although I wish I had thought to tack my pockets down a little further to accomodate the extra elastic width – I had to resew a section of the waistband because the pocket tacking called for in the pattern was a half inch higher than I needed for my wider elastic.
 I had read about problems with rolling elastic, so I used a long stitch to tack the elastic down similar to the method used in the Arenite pants.
Most of the pattern pieces matched up, but I did have some uneven parts at the hem. I’m not sure what happened – I don’t think I flipped the side panels. I had to trim a little around the bottom to even them out.
Before hemming, I tried the pants on to see where I wanted the hem to fall. Even with the scant hem in the instructions, I felt they were going to be a bit high water on me, so I made a 6ish inch. cuff. To fit the taper of the pants, the cuff is a little narrower at the bottom than at the cuff – I started with a rectangle and graded out the seam towards the top. I finished the top edge of the cuff by folding it over twice at a quarter inch, then attached the raw edge to the bottom of the pants with a quarter inch seam. I understitched the seam, tucked it up into the leg of the pants, and secured it to the three seam intersections on the inside of the pant with nice strong stitches, then used matching thread and tiny hem stitches to finish attaching the cuff the rest of the way around.
  I’m really pleased with the result. I wasn’t sure about the color initially, but I’m glad I gave it a try. I have an olive rayon I might use for the next pair.
