
Previous post


I have been kind of quiet here lately, but I have been living my life behind the scenes, and one of the things I did was make a mid 1790’s outfit for a Birthday Tea for Jane Austen’s 249th Earthstrong.
It felt kind of serendipitous: I’d already bought some fabric and several period patterns and had just completed the first and arguably most intimidating piece, short stays, when I was invited to the tea.
It was just the motivation I needed for six weeks of paced sewing to create a look worthy of Jane Austen.
I used a combination of resources, which I link throughout, along with fitting and construction notes. And if you’re just here for the pictures, that’s fine, too.
Shift: I have a sleeveless shift that would have worked, but I made myself a new shift anyway. You can’t have too many. This one has short sleeves and I copied another one I’d already made in to use as a nightgown (I would have used it, but it’s a navy blue). I made the sleeves a bit too long (they almost reached my elbow), so after the event I shortened them a little.
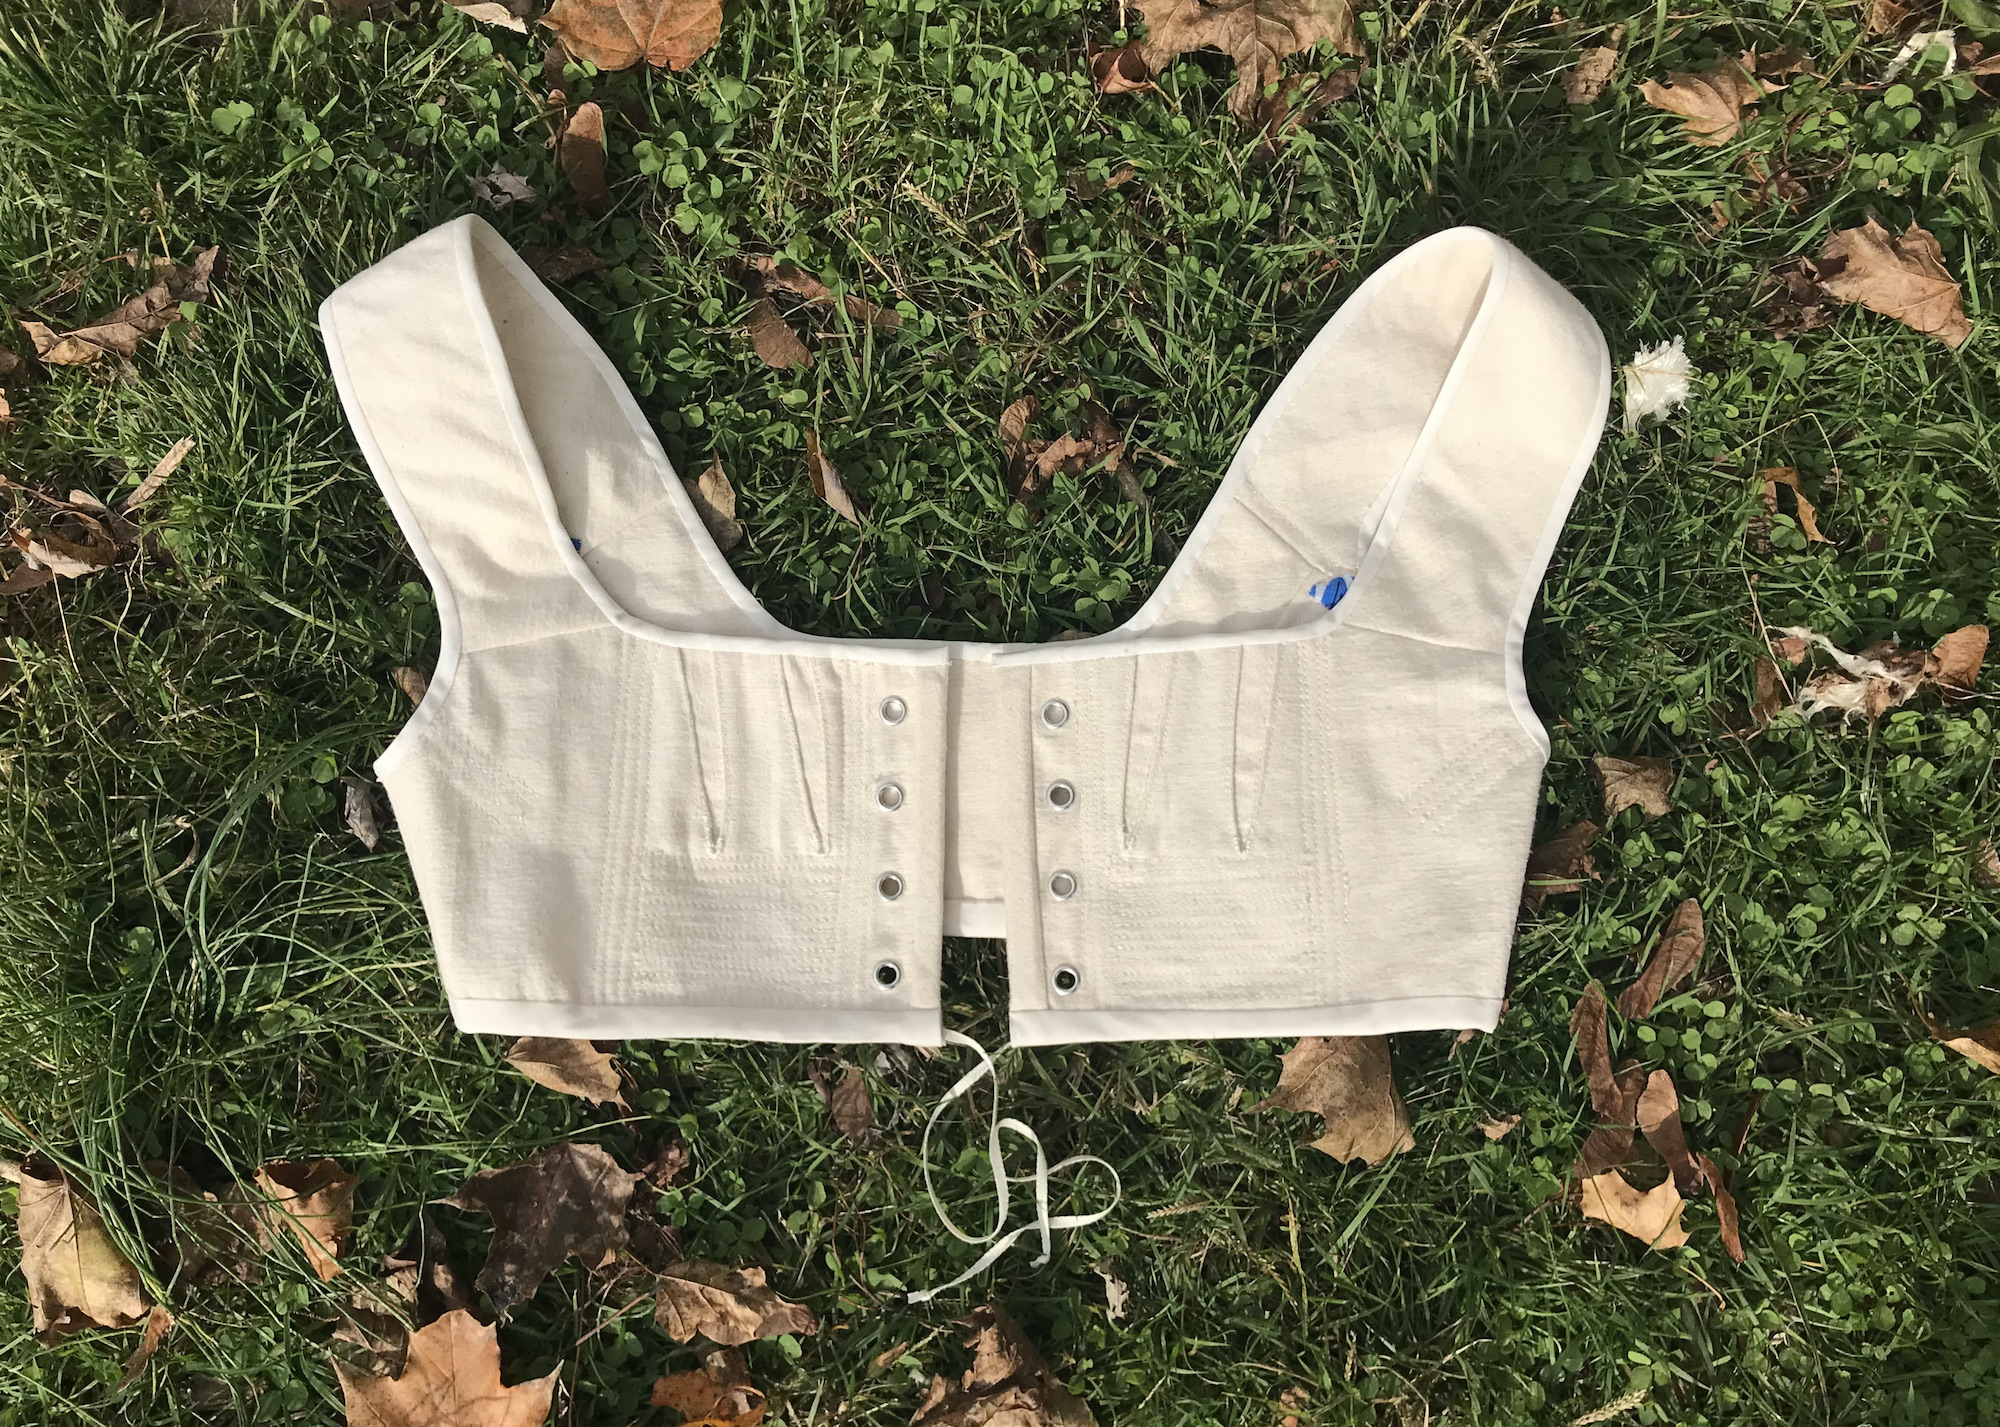
I used the split drawers from this post, but redid the waistband with elastic in the back for comfort and ease of use. This is mainly for warmth as this is a winter event. Short Stays: I used the underpinnings pattern from Sense and Sensibility, two layers of cream cotton twill, with white bias tape and metal eyelets from my stash. I used two zip ties at the front lacing edges.
You can see in the top photo little blue bits inside the stays – because I was using supplies I had on hand, I put quarter inch bias tape on the top edge of the stays and around the armcyes. It didn’t quite cover the raw edges on the joint at the back where the shoulder strap attaches, so I hand sewed in a little piece of quilting to cover up the fraying bits that were sticking out.
I didn’t fully read the instructions about fit (oops) and had to make some adjustments as I went to take the stays in for a better fit. I’m still not sure I got it right. I don’t know if making the gussets a little smaller would give me the “lift and separate” rather than the “minimize” function. I tried it on multiple times and even made the gussets smaller (I used the A cup wedges) but it still seems to function like a sports bra. Although, looking at photos of it on me, maybe I’m not giving myself enough credit.
I mostly machine sewed the stays, but hand sewed around the bottom of the gussets and when attaching the binding to the inside of the stays. I used machine quilting to give the stays structure. Here’s a photo of the initial quilting. I later added even more stitching to the area below where the shoulder strap is attached. As I was making my dress, I had to cut the front of the stays down by half an inch (the amount of space I could remove without cutting into eyelets) because the original stays were peeping out of the top of my dress. If I eventually make another pair of stays, I’ll definitely take even more off the top, as it still peeks out just a little at the top of my dress – although it’s covered by my chemisette (a Regency style dickie).
I increased the height of the dress bodice to correct the stays’ height problem and the dress still barely covers them. Since then, I’ve read for small busted ladies, a lower neckline for the short stays tends to be more flattering. The same post also suggests sewing in some padding, and while I’m not ready for padding, that’s definitely a solid option for the future. For now, mine are good enough, but if I remake them, I’ll lower the neckline a bit more so I don’t have to worry about it peeking out of future dresses.
I think I narrowed the straps a bit, but could have gone even narrower. As is, though, they stay up and don’t impede range of motion.
Under-petticoat, from the American Duchess Guide. 100% handsewn bodice. I machine sewed the long seams on skirt and machine gathered the top of the skirt. I hand finished the hem and front slit. I had to restart bodice three times because of my own error and unclear directions. I didn’t realize the bodice was linen and the skirt was cotton. It’s not explicit in the instructions and you have to look really closely at the photos in the book to tell. I made the whole thing in cotton, then didn’t realize (twice!) that seam allowances weren’t included. What a mess. But I finally got it right.
 I may have overstuffed the butt pad. It was the only aspect of the costume that was uncomfortable. While driving, it was digging into my back. But the rear silhouette looks right, so maybe it’s fine.
I don’t think I’m the first person to observe that driving in period costume is no picnic. That experience brought to mind the lion from the Wizard of Oz exasperatedly batting his tail away.
My favorite fashion plates from this era frequently show a full length petticoat under the dress,with pretty ruffles or other interesting fabric trim. To really nail the silhouette of this time period, I could probably benefit from a second petticoat, and trying something creative with the hem could be fun.  I didn’t have time before my event, but eventually I want to make another underpetti with either a zig zag hem made of fabric triangles, sari trim, or a ruffle, so I can have that double layer of fun. To keep the multiple layers of fabric under control, I’d make it with ribbon straps I can pin to my first underpetticoat.
It was a lot of layers to get into, but it felt effortless once I had everything on. I wore my costume for 5 hours for the event and I was comfortable the whole time except for the bum pad while driving and the anxiety attack I was having on the way there over being late.
I’ll feature the outer layers of this outfit in the next post.


