
Previous post

Next post


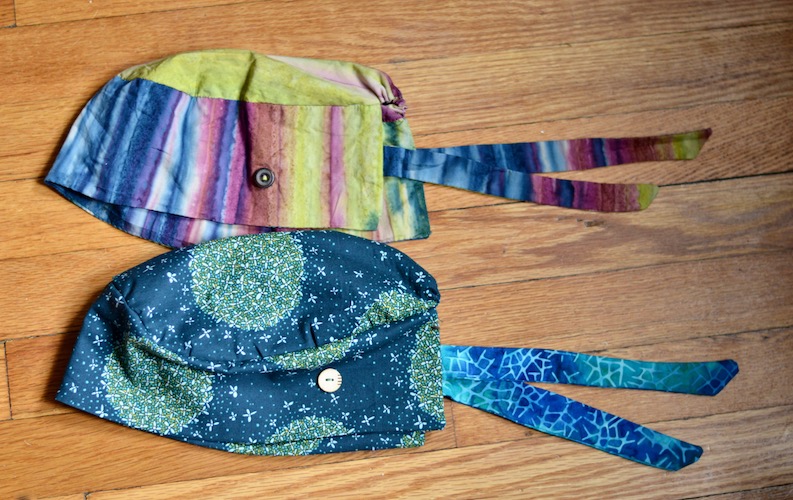
Health Care Workers, use this cap to: Cushion your head and ears from the multiple insults of masks, face shields, and/or googles layered on top of each other. Tuck your unwashed, freshly washed, or uncooperative hair away.
The cap is fully lined and can be hand or machine sewn. You need less than a half yard of fabric, two buttons (I used 5/8 in. buttons) and matching thread. I used a quarter inch seam allowance since all the edges are enclosed.
For reference, my head circumference is 21.5 in. If your head is significantly bigger or smaller, you might want to adjust the length of the band and the size of the oval top piece. Trace a strip on the fold of your fabric measuring 4 inches by 11 inches. The fold will be on the short side, so you end up with a strip 22 inches by 4 inches. You’ll need two of these.
Make a rectangle, length = 10.5 inches, width = 8 inches. Round the corners to make an oval. Or just draw an oval with that width and length, if you are confident with your freehand skills. Trace two ovals.
This size top piece will work for someone who wears a protective style with braids/hair wrapped around your head, short hair/thin hair, or a ponytail that comes out the hole in the back.
If you need more space, or want to tuck your hair into a pocket in the back, you can make a round bulge at the back (see image above), or elongate the oval piece. This whole piece will be gathered, so making it a “nice” shape/size isn’t as important as making it big enough to fit your hair. Since all the pieces are finished before putting them together, it won’t matter if the dimensions of the top piece match the band. The ends of the band and the ties can wrap around or under the hair in the back to close. If you make a top piece with a hair bulge (sack?), you’ll need to notch/clip the joint where the round shapes meet before turning it right side out to prevent puckering.
Cut four tie pieces, 1 5/8 in. wide. The length at the point is 10 in., with the shorter length at the bottom 8 3/4 in. (see image above).
Sew the oval and the two ties right sides together with quarter inch seams. Leave a small opening on the side of the oval for turning it right side out, and leave the straight end of the ties open to turn them. To keep the tie points sharp(er), clip and/or trim the seam allowance the corners of the points before turning.
When you sew the band right sides together, placing the ties facing inwards in the center of the short ends, like this: Don’t forget to leave an opening so you can turn it out. Trim the corners before turning. Machine sew the opening closed or whip it closed by hand.
Mark the center of the band and the center of the oval on the short end and match them up. Make sure the points of the ties are facing the direction you want if that is something you care about. For a clean finish, make sure the entire seam where the pieces meet on both the oval and the band are on the inside of the cap when you attach the two pieces. For the two caps I made, one I whipped these two pieces together at the edges, and the other I sewed them by machine with a scant seam allowance. There will be a section of the oval at the back that is not attached to the band. I gathered this using a quarter-inch wide running stitch, pulled it tight and tied it off.
For a little more room on top, you can put a running stitch all the way around the oval and slightly gather it before attaching it to the band, making the shape more rounded.
For a ponytail pouch, sew a fabric channel around the back bulge of the alternate shape by whipping or machine sewing a narrow strip of fabric with the ends folded under, or use a piece of bias tape.  Thread a slender elastic through, sew it down on one end, and check the fit before securing the other end.
Try the cap on and mark the sides where you want the buttons. Mine are just behind my ears.  Sew the buttons on and you’re good to go.


