
Previous post

Next post


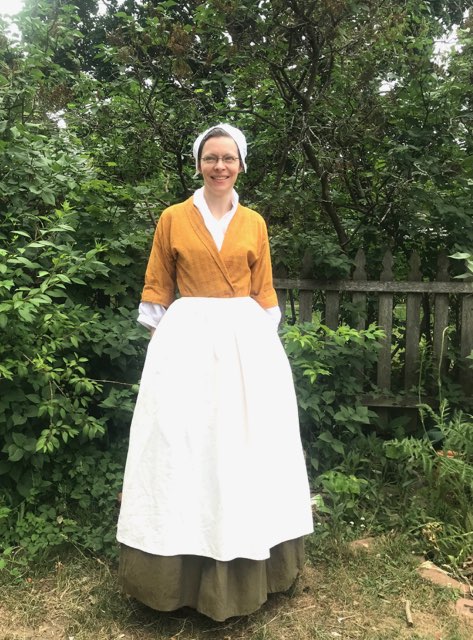
Next up with my historical costuming adventure, a European bedgown, or Manteau de Lit. They are fantastically versatile, and much easier to make than the more fitted jackets from the 18th century, which required suiting up in all my underpinnings for fittings.
I picked a golden ikat cotton fabric because it reminded me of the color of the bodice from The Girl With The Pearl Earring by Vermeer. I had an idea I would recreate the painting with 18th century clothes. The painting was done in the 1600’s, and that means in order to get the look right in its own era, I’d have to make a new set of stays and possibly also a different type of shift, and I’m just not ready. I only found 4 or 5 bloggers who wrote about the process of making a bedgown, and my research came in fits and starts as a result of family life. (Scroll to the bottom of the post to see some of the resources I used).
I did all the mental math for the measuring and cutting in one day, and started with the goal of handsewing the entire thing, then realized that A. Most of the seams wouldn’t show. and B. I didn’t need it to be completely handsewn, psychologically speaking. So I compromised by machine sewing the remaining interior seams and hand finishing the seam allowances and hems. One area where I didn’t follow the instructions was the skirt portion of the bedgown. In the instructions, it says to remove strips of fabric down the sides of the skirt. I left the skirt as wide as the sleeves and just made a big inverted box pleat with it. This created big flaps to secure inside the bedgown.
The reason I did it that way is because I didn’t want to have to finish the lower seams (because I was hand sewing them), and keeping it the same width as the fabric meant I would be working with the selvage. I had some trouble with the neckline. I couldn’t remember if I had removed the tabs of fabric from the neckline, intending to use them for gussets. That could have been the problem. After having made a second bedgown for my daughter, I concluded that it just took me a while to figure out how it went together, and I started to second guess myself.
Sewing a square of fabric at the top of the neckline is necessary to finish the bedgown. I think my solution was more complex than it needed to be, with a patched area I made using scraps of the fabric. It may not be exactly what was intended, but it works. Instead of folding and tacking down the neckline for the collar or adding a separate strip of fabric, I finished the edges of the front and let it fall back into a shawl collar around the neckline. I think that is one of the acceptable finishing methods and I’m pleased with how it turned out.
Big bonus? I’ve always wanted a duster (I actually have two different duster patterns gathering dust in my sewing area) and the bedgown fits the bill. It could also be a bathrobe. All this flexibility and it doesn’t look dowdy at all.
 I love the way the ikat looks luminous when it catches the light, with pink and grey cross fibers that give the fabric a deep, iridescent quality.
Resources:
This website has the traditional Garsault instructions translated and explained using the original illustrations as well as some additional ones by the author of the blog.
This site is a round-up of great historical research including links to paintings that feature people wearing bedgowns so you can see the garment in action.
Here’s a blogger who made a nice bedgown.


